플레이스토어 인앱 결제 지원하기 (w/ Flutter + FastAPI 서버)
이 글은 ChatGPT가 작성한 초안을 바탕으로, 직접 테스트 및 검증을 거쳐 수정·보완한 내용입니다.
동작 방식 간단 리뷰
sequenceDiagram
    participant App as 앱
    participant PlayUI as 스토어 결제 UI
    participant BE as 서버
    participant DevAPI as Google Play Developer API

    App->>PlayUI: "결제 플로우 시작"
    PlayUI-->>App: "구매 결과 (purchaseToken)"
    App->>BE: "토큰 전송 (purchaseToken, userId 등)"
    BE->>DevAPI: "검증 호출 (subscriptionsv2.get)"
    DevAPI-->>BE: "검증 응답 ('상태·상품·만료·ACK 상태')"
    BE->>DevAPI: "서버 ACK 호출 (purchases.subscriptions:acknowledge)"
    DevAPI-->>BE: "ACK 완료"
    BE->>BE: "Entitlement 부여·DB 기록"
    BE-->>App: "구매 성공 응답 ('권한/만료시각')"
- 결제 직후 앱은 purchaseToken 을 서버로 보냄 → 서버가 Developer API로 검증하고 필요 시 ACK 처리(구독 인정).
Google Play Developer API 설정
검증·ACK용으로 service account를 발급 받아야 합니다.
서버는 해당 account 권한으로 검증·ACK 호출을 수행합니다.
1-1. GCP 프로젝트 & API 활성화
- Google Cloud Console → 프로젝트 선택/생성
- Google Play Developer API 활성화(API Library에서 Enable)

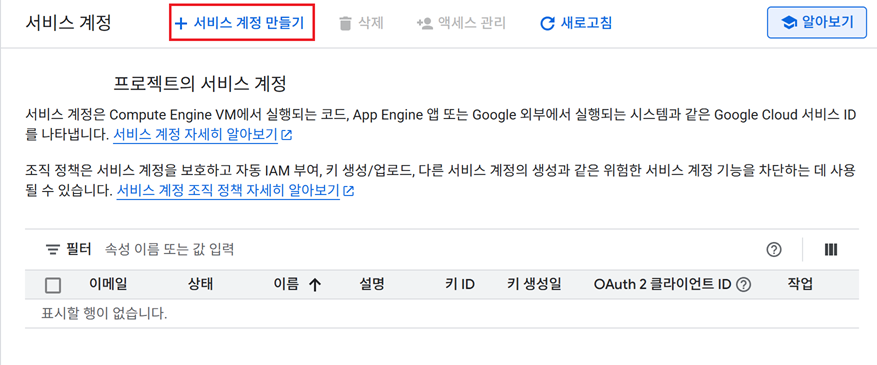
1-2. 서비스 계정 만들기 & JSON 키 발급
- IAM & Admin → Service Accounts → Create service account
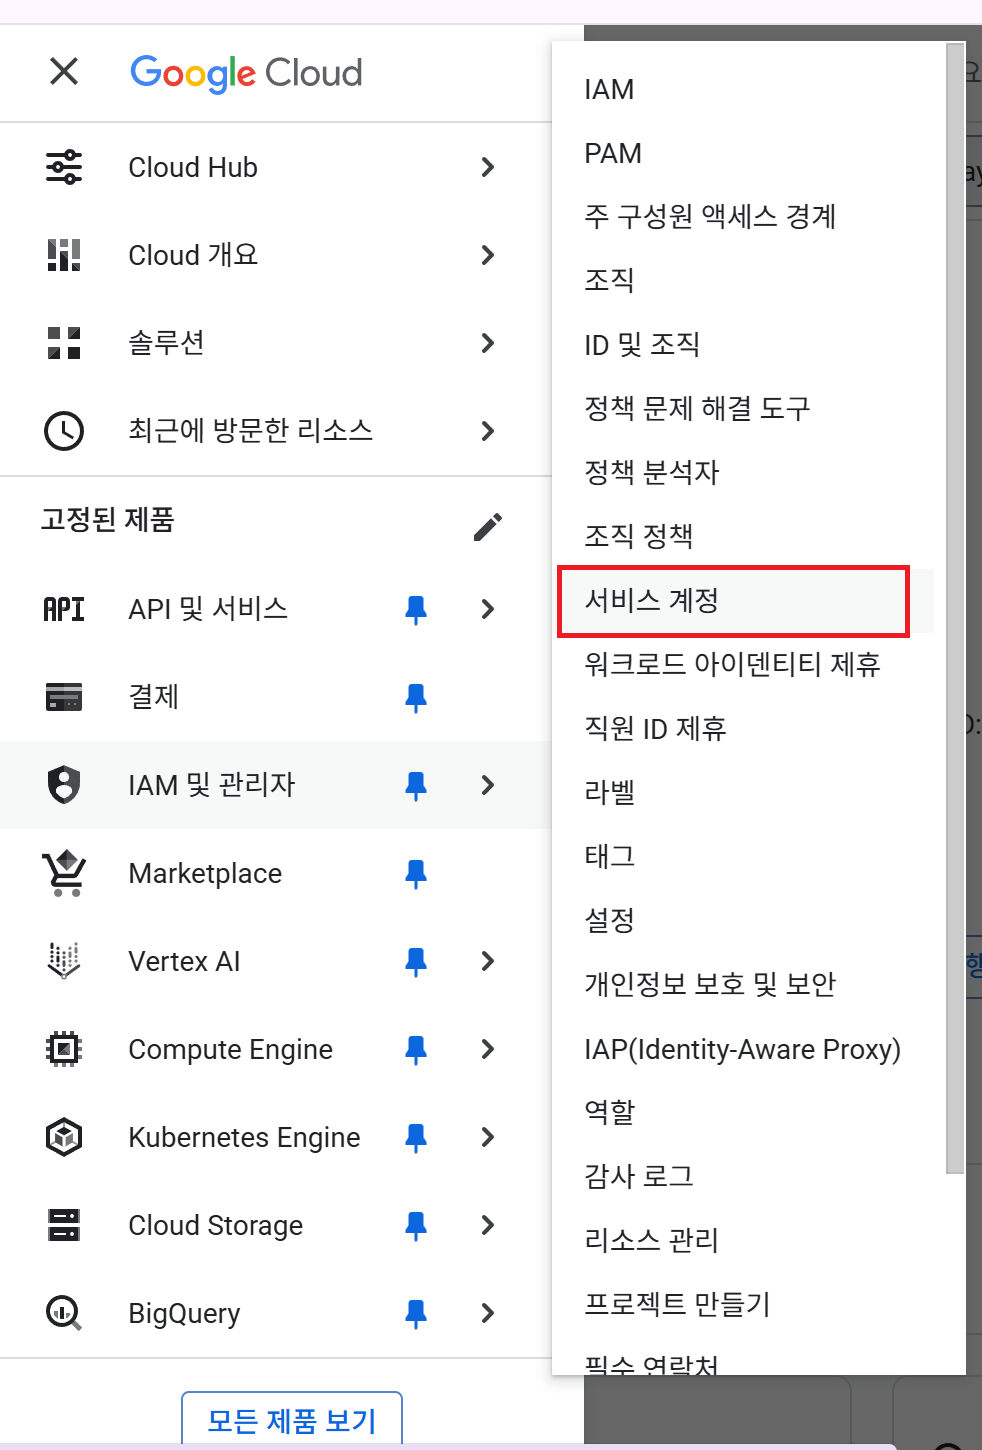
서비스 계정 이름(Service Account Name) 은 완전히 자유롭게 지정할 수 있지만, 운영 목적을 명확히 드러내는 규칙적 네이밍이 좋습니다. (ex. play-billing-verifier)
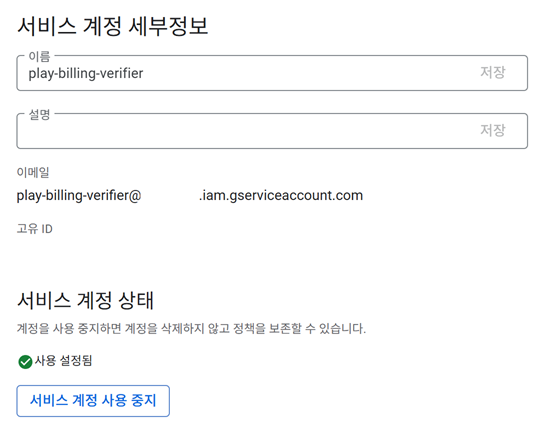
여기서 생성된 이메일을 기억해야합니다.
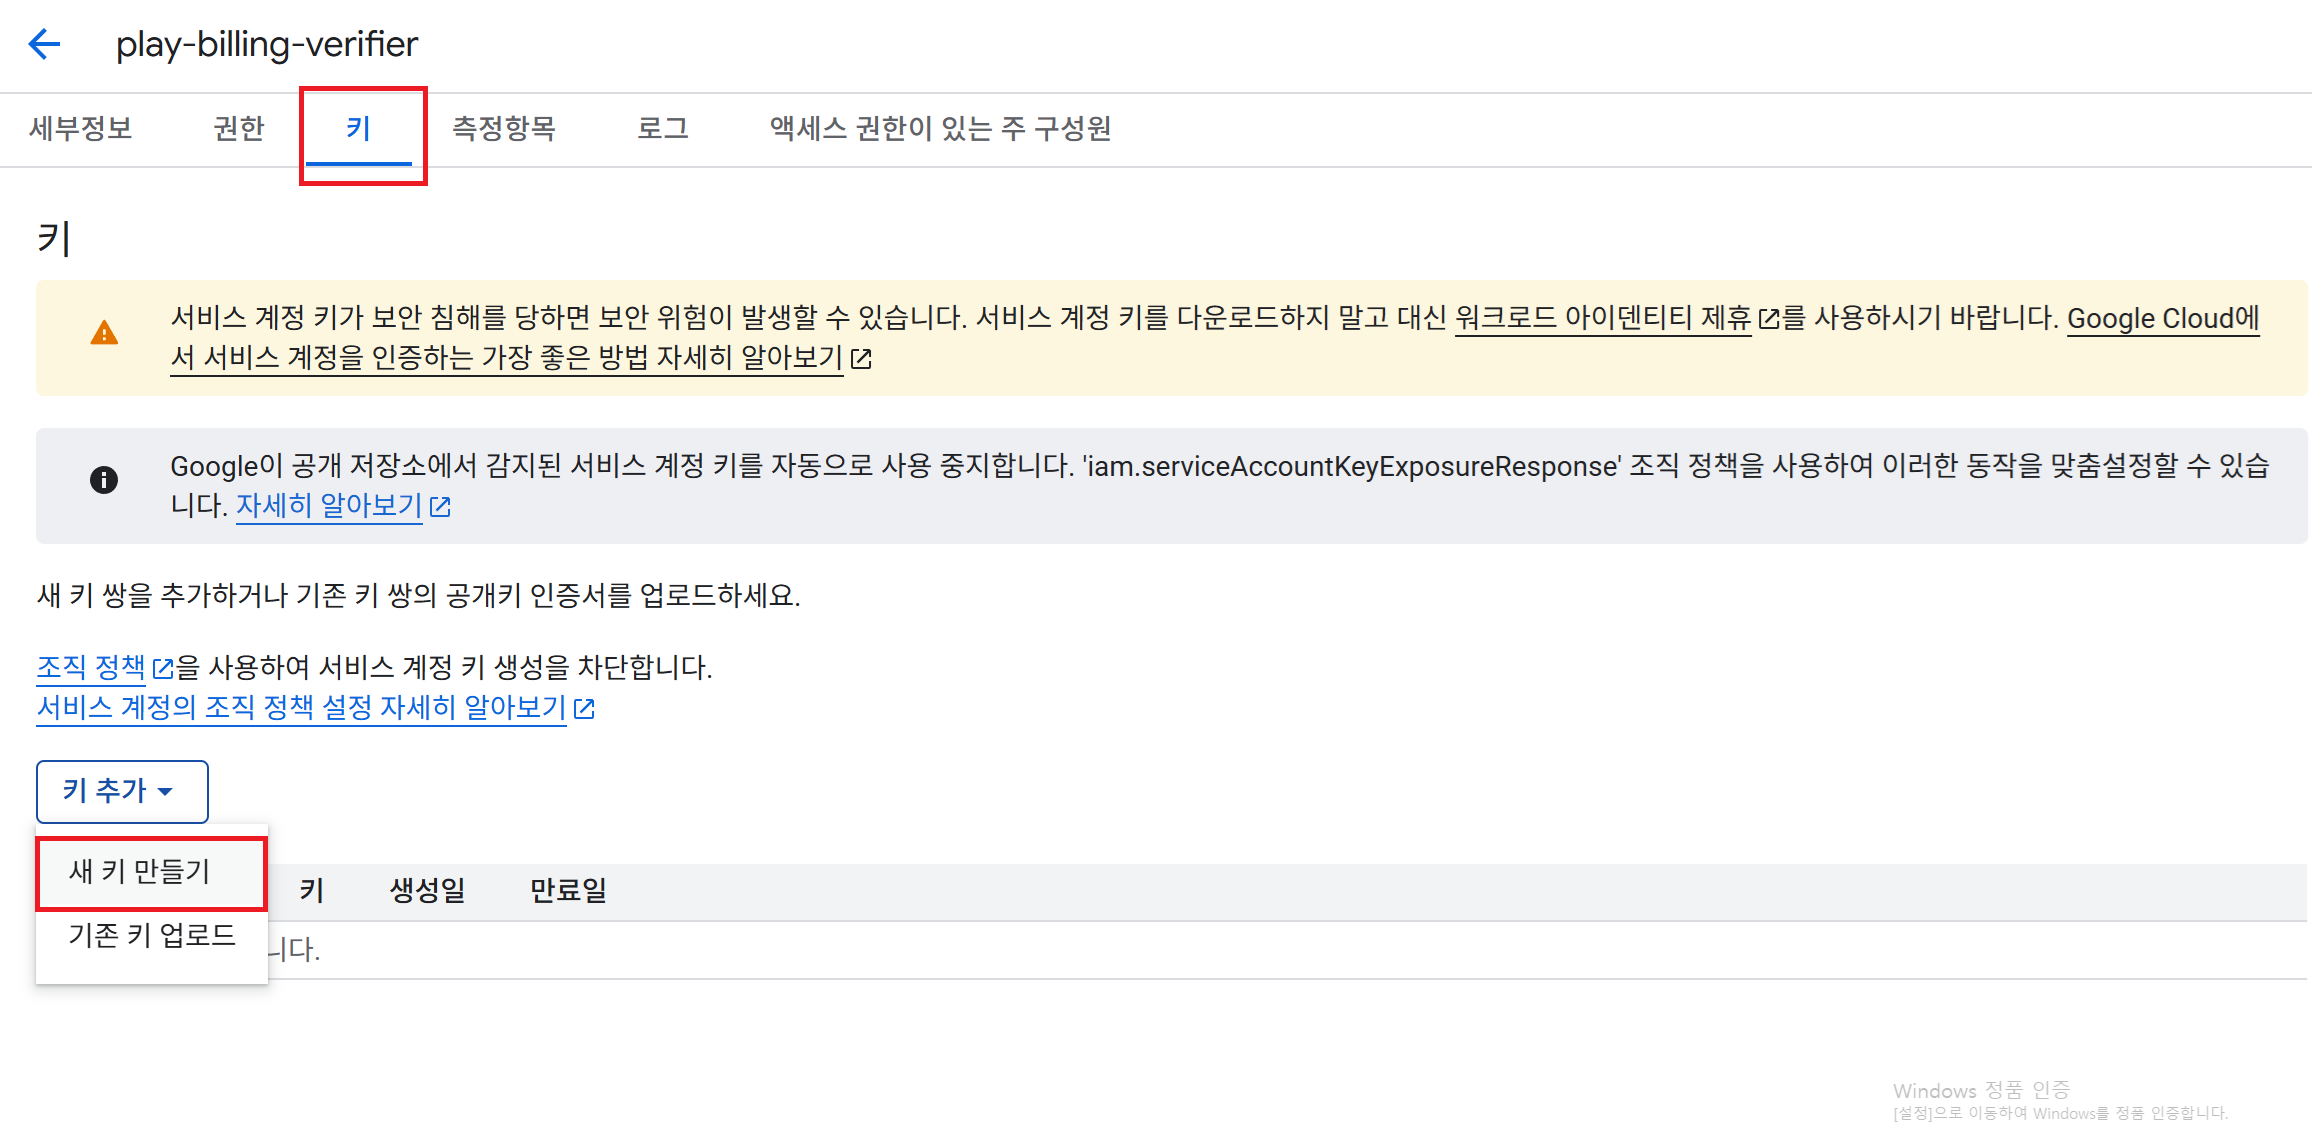
- Keys → Add key → Create new key → JSON (서버가 사용할 “키” 파일)
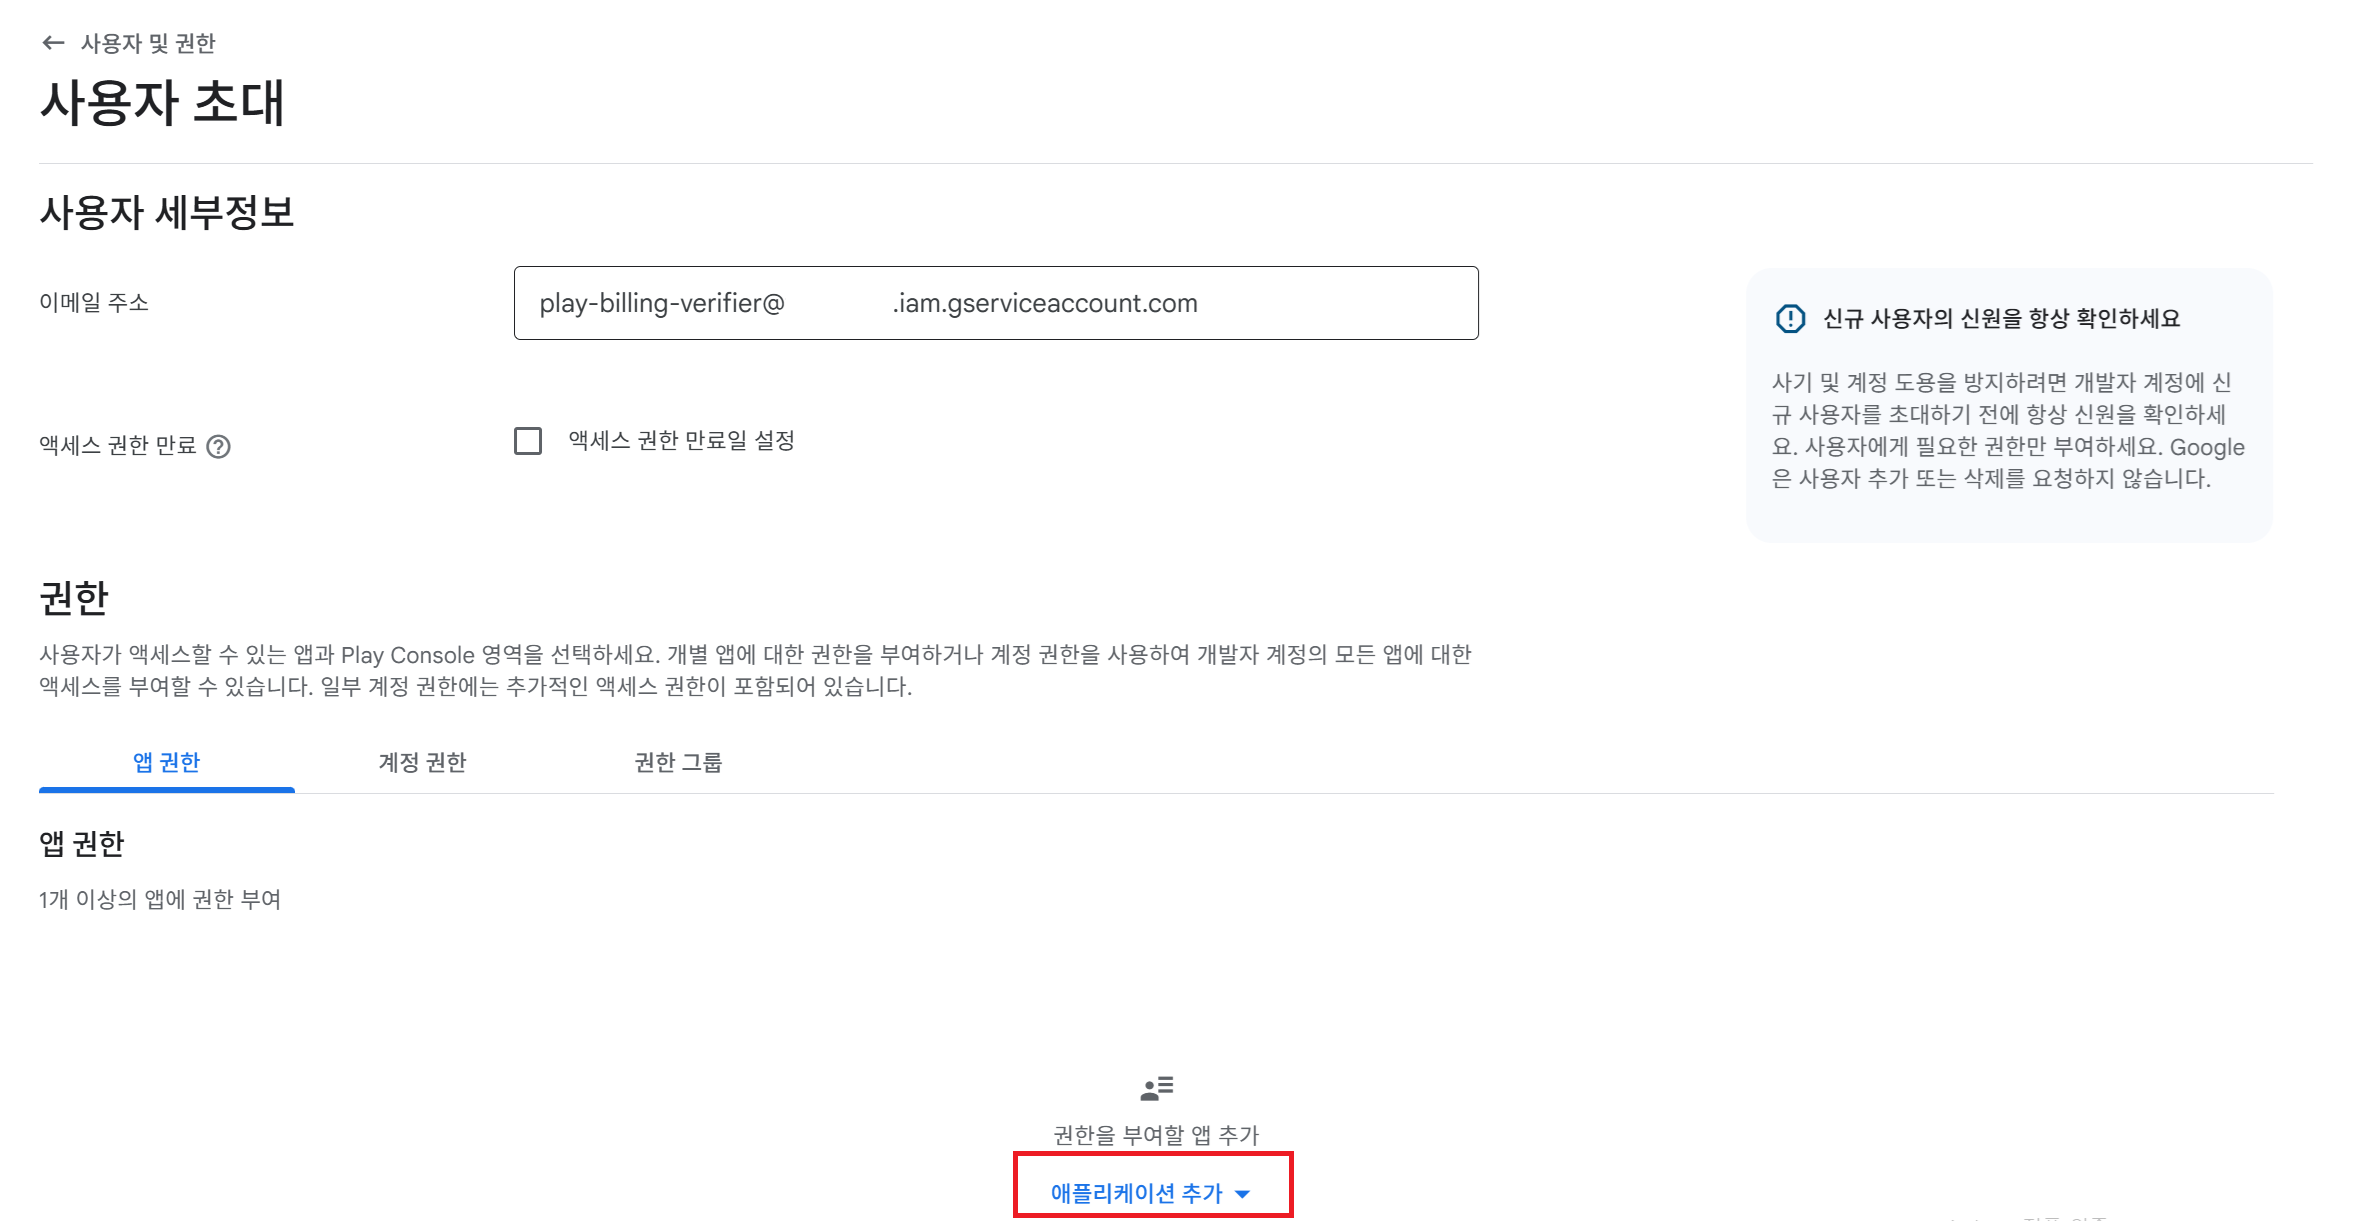
1-3. Play Console에 서비스 계정 “사용자”로 초대
Play Console → Users & permissions → Invite new users

- 서비스 계정 이메일(
...@...iam.gserviceaccount.com)을 입력 권한 부여(앱 단위 또는 전체):
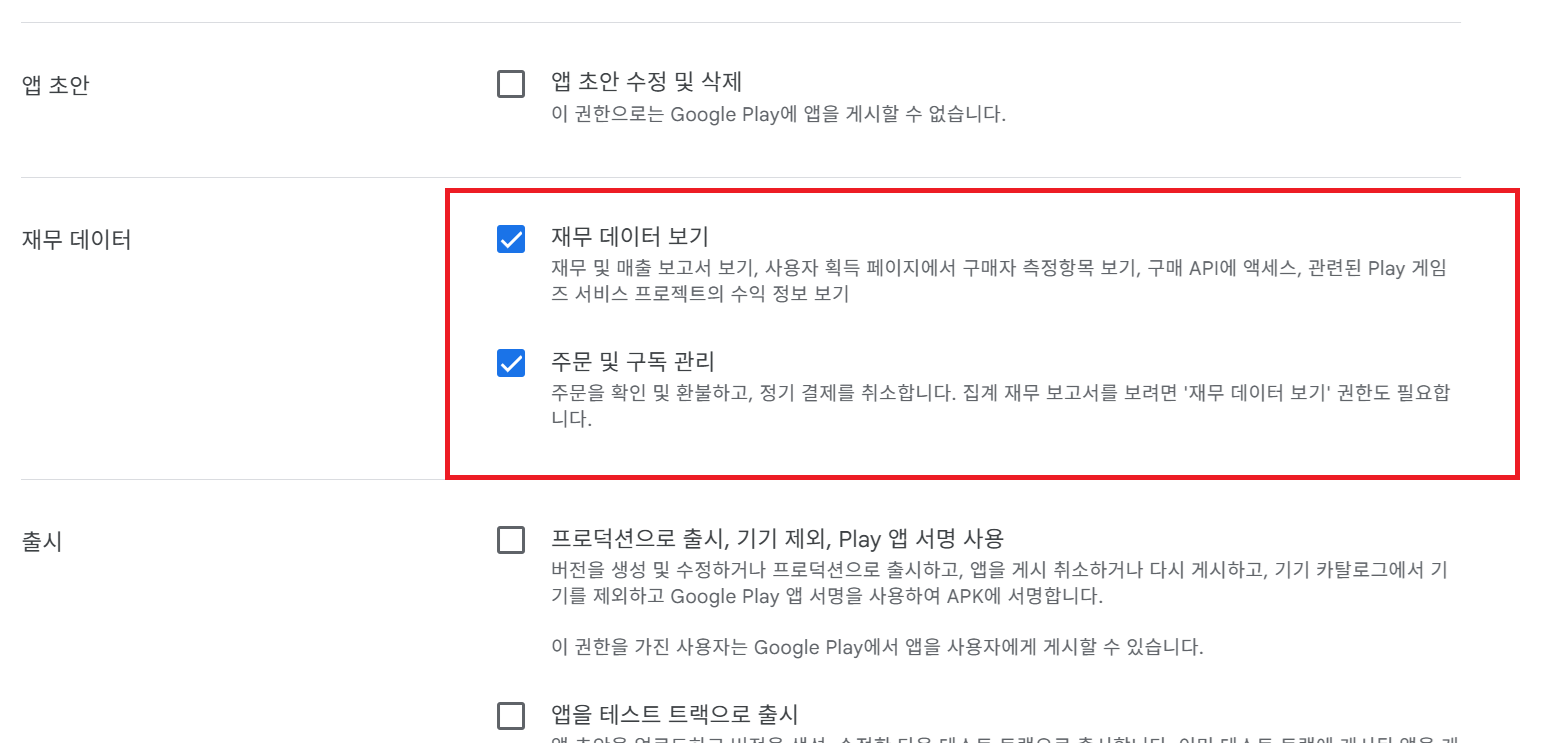
- Manage orders and subscriptions,
- View financial data, orders, and cancellation survey responses 선택
초대 완료 후 실제 반영까지 약 5~10분 정도 지연될 수 있습니다.
FastAPI 예시 코드
2-1. 의존성
1
pip install fastapi uvicorn google-auth google-api-python-client google-auth-httplib2 pydantic[dotenv] httpx
2-2. 환경 변수
GOOGLE_APPLICATION_CREDENTIALS: 서비스 계정 JSON 파일 경로(또는 런타임에 직접 로딩).
2-3. 예시 코드
1
2
3
4
5
6
7
8
9
10
11
12
13
14
15
16
17
18
19
20
21
22
23
24
25
26
27
28
29
30
31
32
33
34
35
36
37
38
39
40
41
42
43
44
45
46
47
48
49
50
51
52
53
54
55
56
57
58
59
60
61
62
63
64
65
66
67
68
69
70
71
72
73
74
75
76
77
78
79
80
81
82
83
84
85
86
87
88
89
90
91
92
# app.py
from fastapi import FastAPI, HTTPException
from pydantic import BaseModel
from typing import Optional
import os

from google.oauth2 import service_account
from googleapiclient.discovery import build
from googleapiclient.errors import HttpError

SCOPES = ["https://www.googleapis.com/auth/androidpublisher"]  # DevAPI 권한 스코프

app = FastAPI(title="IAP Verify API")

class VerifyReq(BaseModel):
    package_name: str
    purchase_token: str
    user_id: Optional[str] = None  # 내부 매핑용(선택)

def _android_publisher():
    # 1) 서비스 계정 자격
    cred_path = os.environ.get("GOOGLE_APPLICATION_CREDENTIALS")
    if not cred_path or not os.path.exists(cred_path):
        raise RuntimeError("GOOGLE_APPLICATION_CREDENTIALS not set or file missing")
    creds = service_account.Credentials.from_service_account_file(
        cred_path, scopes=SCOPES
    )
    # 2) 클라이언트 생성
    return build("androidpublisher", "v3", credentials=creds, cache_discovery=False)

def _get_sub_purchase(pub, package_name, token):
    # subscriptionsv2.get: 구독의 권위 상태 조회
    # 응답: SubscriptionPurchaseV2 (acknowledgementState, subscriptionState, lineItems[0].productId 등)
    return pub.purchases().subscriptionsv2().get(
        packageName=package_name, token=token
    ).execute()  # :contentReference[oaicite:10]{index=10}

def _acknowledge_if_needed(pub, package_name, token, product_id):
    # 서버 ACK (중복 금지; 이미 ACK이면 생략)
    try:
        pub.purchases().subscriptions().acknowledge(  # :contentReference[oaicite:11]{index=11}
            packageName=package_name,
            subscriptionId=product_id,
            token=token,
            body={"developerPayload": "server-ack-v1"}
        ).execute()
        return True
    except HttpError as e:
        # 이미 ACK된 경우 등은 무시(409/400일 수 있음). 동시에 클라도 ACK하면 충돌 가능. :contentReference[oaicite:12]{index=12}
        return False

@app.post("/iap/google/verify")
def verify(req: VerifyReq):
    pub = _android_publisher()

    try:
        v2 = _get_sub_purchase(pub, req.package_name, req.purchase_token)
    except HttpError as e:
        # 잘못된 토큰/권한 등
        raise HTTPException(status_code=400, detail=f"verify_failed: {e}")

    ack_state = v2.get("acknowledgementState")  # "ACKNOWLEDGEMENT_STATE_PENDING" | "ACKNOWLEDGEMENT_STATE_ACKNOWLEDGED"
    sub_state = v2.get("subscriptionState")     # "SUBSCRIPTION_STATE_ACTIVE" 등
    product_id = None
    try:
        product_id = (v2.get("lineItems") or [{}])[0].get("productId")
    except Exception:
        pass

    # 서버 ACK 권장: 아직 PENDING이면 ACK 시도
    did_ack = False
    if ack_state != "ACKNOWLEDGEMENT_STATE_ACKNOWLEDGED" and product_id:
        did_ack = _acknowledge_if_needed(pub, req.package_name, req.purchase_token, product_id)

        # ACK 후 재조회로 상태 확정
        try:
            v2 = _get_sub_purchase(pub, req.package_name, req.purchase_token)
            ack_state = v2.get("acknowledgementState")
            sub_state = v2.get("subscriptionState")
        except HttpError:
            pass

    # 여기서 Entitlement/DB 처리 (예: ACTIVE면 부여, 만료일 등 라인아이템 참고)
    # save_subscription(user_id=req.user_id, product_id=product_id, state=sub_state, raw=v2) ...

    return {
        "ok": True,
        "acknowledgementState": ack_state,
        "subscriptionState": sub_state,
        "productId": product_id,
        "didServerAck": did_ack
    }
Flutter 예시 코드
3-1. 의존성
1
2
3
4
# pubspec.yaml
dependencies:
  in_app_purchase: ^3.2.3
  http: ^1.2.0
3-2. 예시 코드(핵심만)
1
2
3
4
5
6
7
8
9
10
11
12
13
14
15
16
17
18
19
20
21
22
23
24
25
26
27
28
29
30
31
32
33
34
35
36
37
38
39
40
41
42
43
44
45
46
47
48
49
50
51
52
53
54
55
56
57
58
59
60
61
62
63
64
65
66
67
68
69
70
71
72
73
74
75
76
77
78
79
80
81
82
83
84
85
86
87
88
89
90
91
92
93
94
95
96
97
98
99
100
101
102
103
104
105
106
107
108
109
110
111
112
113
114
115
116
117
118
119
120
121
122
123
124
125
126
127
128
129
130
131
132
133
134
135
136
137
138
139
140
141
142
143
144
145
146
147
148
149
150
151
152
153
154
155
156
157
158
159
160
161
162
163
164
165
166
167
168
169
170
// iap_test_page.dart
import 'dart:async';
import 'dart:convert';
import 'dart:io' show Platform;

import 'package:flutter/material.dart';
import 'package:in_app_purchase/in_app_purchase.dart';
import 'package:http/http.dart' as http;

class IapTestPage extends StatefulWidget {
  const IapTestPage({super.key});

  @override
  State<IapTestPage> createState() => _IapTestPageState();
}

class _IapTestPageState extends State<IapTestPage> {
  final InAppPurchase _iap = InAppPurchase.instance;

  // 실제 콘솔과 동일한 상품 ID이어야 함!
  static const Set<String> productIds = {
    'premium_subscription',
  };

  late StreamSubscription<List<PurchaseDetails>> _sub;
  List<ProductDetails> _products = [];
  String _status = '초기화 중...';

  // 서버 검증 URL (너의 FastAPI 엔드포인트)
  final String verifyUrl = 'https://api.example.com/iap/google/verify';

  @override
  void initState() {
    super.initState();
    _initIap();
  }

  Future<void> _initIap() async {
    try {
      final available = await _iap.isAvailable();
      if (!available) {
        setState(() => _status = '스토어 사용 불가(테스트 계정/설치 경로 확인)');
        return;
      }

      // 구매 스트림 구독
      _sub = _iap.purchaseStream.listen(_onPurchases, onDone: () => _sub.cancel());

      // 상품 조회
      final resp = await _iap.queryProductDetails(productIds);
      if (resp.error != null) {
        setState(() => _status = '상품 조회 에러: ${resp.error}');
        return;
      }
      if (resp.productDetails.isEmpty) {
        setState(() => _status = '상품이 없습니다(상품ID/트랙/배포 확인)');
        return;
      }
      setState(() {
        _products = resp.productDetails;
        _status = '상품 로드 완료';
      });
    } catch (e) {
      setState(() => _status = '초기화 실패: $e');
    }
  }

  @override
  void dispose() {
    _sub.cancel();
    super.dispose();
  }

  Future<void> _onPurchases(List<PurchaseDetails> list) async {
    for (final p in list) {
      if (p.status == PurchaseStatus.purchased || p.status == PurchaseStatus.restored) {
        final token = p.verificationData.serverVerificationData;
        setState(() => _status = '서버 검증 중... (token=${token.isEmpty ? "EMPTY" : "OK"})');

        try {
          final res = await http.post(
            Uri.parse(verifyUrl),
            headers: {'Content-Type': 'application/json'},
            body: jsonEncode({
              'package_name': 'com.example.app', // 실제 패키지명으로 교체
              'purchase_token': token,
              'user_id': 'testUser123',
            }),
          );

          final data = jsonDecode(res.body);
          final ackState = data['acknowledgementState'];
          final subState = data['subscriptionState'];
          final didServerAck = data['didServerAck'] == true;

          setState(() => _status =
              '서버 응답: sub=$subState, ack=$ackState, didServerAck=$didServerAck');

          // 권한 부여(로컬 표시): 운영에선 서버 응답을 신뢰
          if (res.statusCode == 200 && subState == 'SUBSCRIPTION_STATE_ACTIVE') {
            // 여기서 Premium UI 해금 등
          }

          // ACK 중복 방지: 서버 ACK을 쓴 경우 Android는 생략 가능
          if (p.pendingCompletePurchase) {
            final shouldCompleteOnAndroid = !(Platform.isAndroid &&
                ackState == 'ACKNOWLEDGEMENT_STATE_ACKNOWLEDGED' &&
                didServerAck);

            if (!Platform.isAndroid || shouldCompleteOnAndroid) {
              await _iap.completePurchase(p);
              setState(() => _status += ' | completePurchase 호출');
            } else {
              setState(() => _status += ' | completePurchase 생략(서버 ACK)');
            }
          }
        } catch (e) {
          setState(() => _status = '서버 검증 실패: $e');
        }
      } else if (p.status == PurchaseStatus.error) {
        setState(() => _status = '구매 에러: ${p.error}');
      } else if (p.status == PurchaseStatus.pending) {
        setState(() => _status = '구매 진행 중...');
      }
    }
  }

  Future<void> _buy(ProductDetails pd) async {
    final param = PurchaseParam(productDetails: pd);
    await _iap.buyNonConsumable(purchaseParam: param); // 구독은 non-consumable 플로우 사용
  }

  @override
  Widget build(BuildContext context) {
    return Scaffold(
      appBar: AppBar(title: const Text('IAP 테스트')),
      body: Padding(
        padding: const EdgeInsets.all(16),
        child: Column(
          children: [
            Text(_status),
            const SizedBox(height: 16),
            if (_products.isEmpty)
              const Text('표시할 상품이 없습니다')
            else
              Expanded(
                child: ListView.separated(
                  itemCount: _products.length,
                  separatorBuilder: (_, __) => const Divider(),
                  itemBuilder: (_, i) {
                    final p = _products[i];
                    return ListTile(
                      title: Text('${p.title}'),
                      subtitle: Text('${p.description}\n가격: ${p.price} (${p.id})'),
                      isThreeLine: true,
                      trailing: ElevatedButton(
                        onPressed: () => _buy(p),
                        child: const Text('구매'),
                      ),
                    );
                  },
                ),
              ),
          ],
        ),
      ),
    );
  }
}
위 코드에서 상품 ID로 premium_subscription을 사용했다는 것을 주의하세요. Google Play Console에서 구독 상품 id를 동일하게 맞춰주어야 합니다.
Google Play Console 결제 환경 구성 및 테스트
테스트 결제는 실제 결제 없이 내부 테스트 트랙과 라이선스 테스트 계정을 이용해 전 과정을 검증할 수 있습니다.
4-1. 테스트 트랙(App Bundle 업로드)
- Play Console → “내부 테스트 트랙(Internal testing)” →
Create new release또는 기존 트랙 선택 .aab업로드 (release 빌드, 서명 필수)- 테스터 계정 추가 → “테스트 참여자 추가” 버튼을 눌러 Google 계정(Gmail) 등록
- 저장 후 배포 링크(URL) 생성 → 이 링크를 통해 테스터가 Play 스토어에서 앱을 설치해야 함 (APK 직접 설치는 안 됨 — Play Store 앱을 통해 설치해야 Billing 연결이 인증됨)
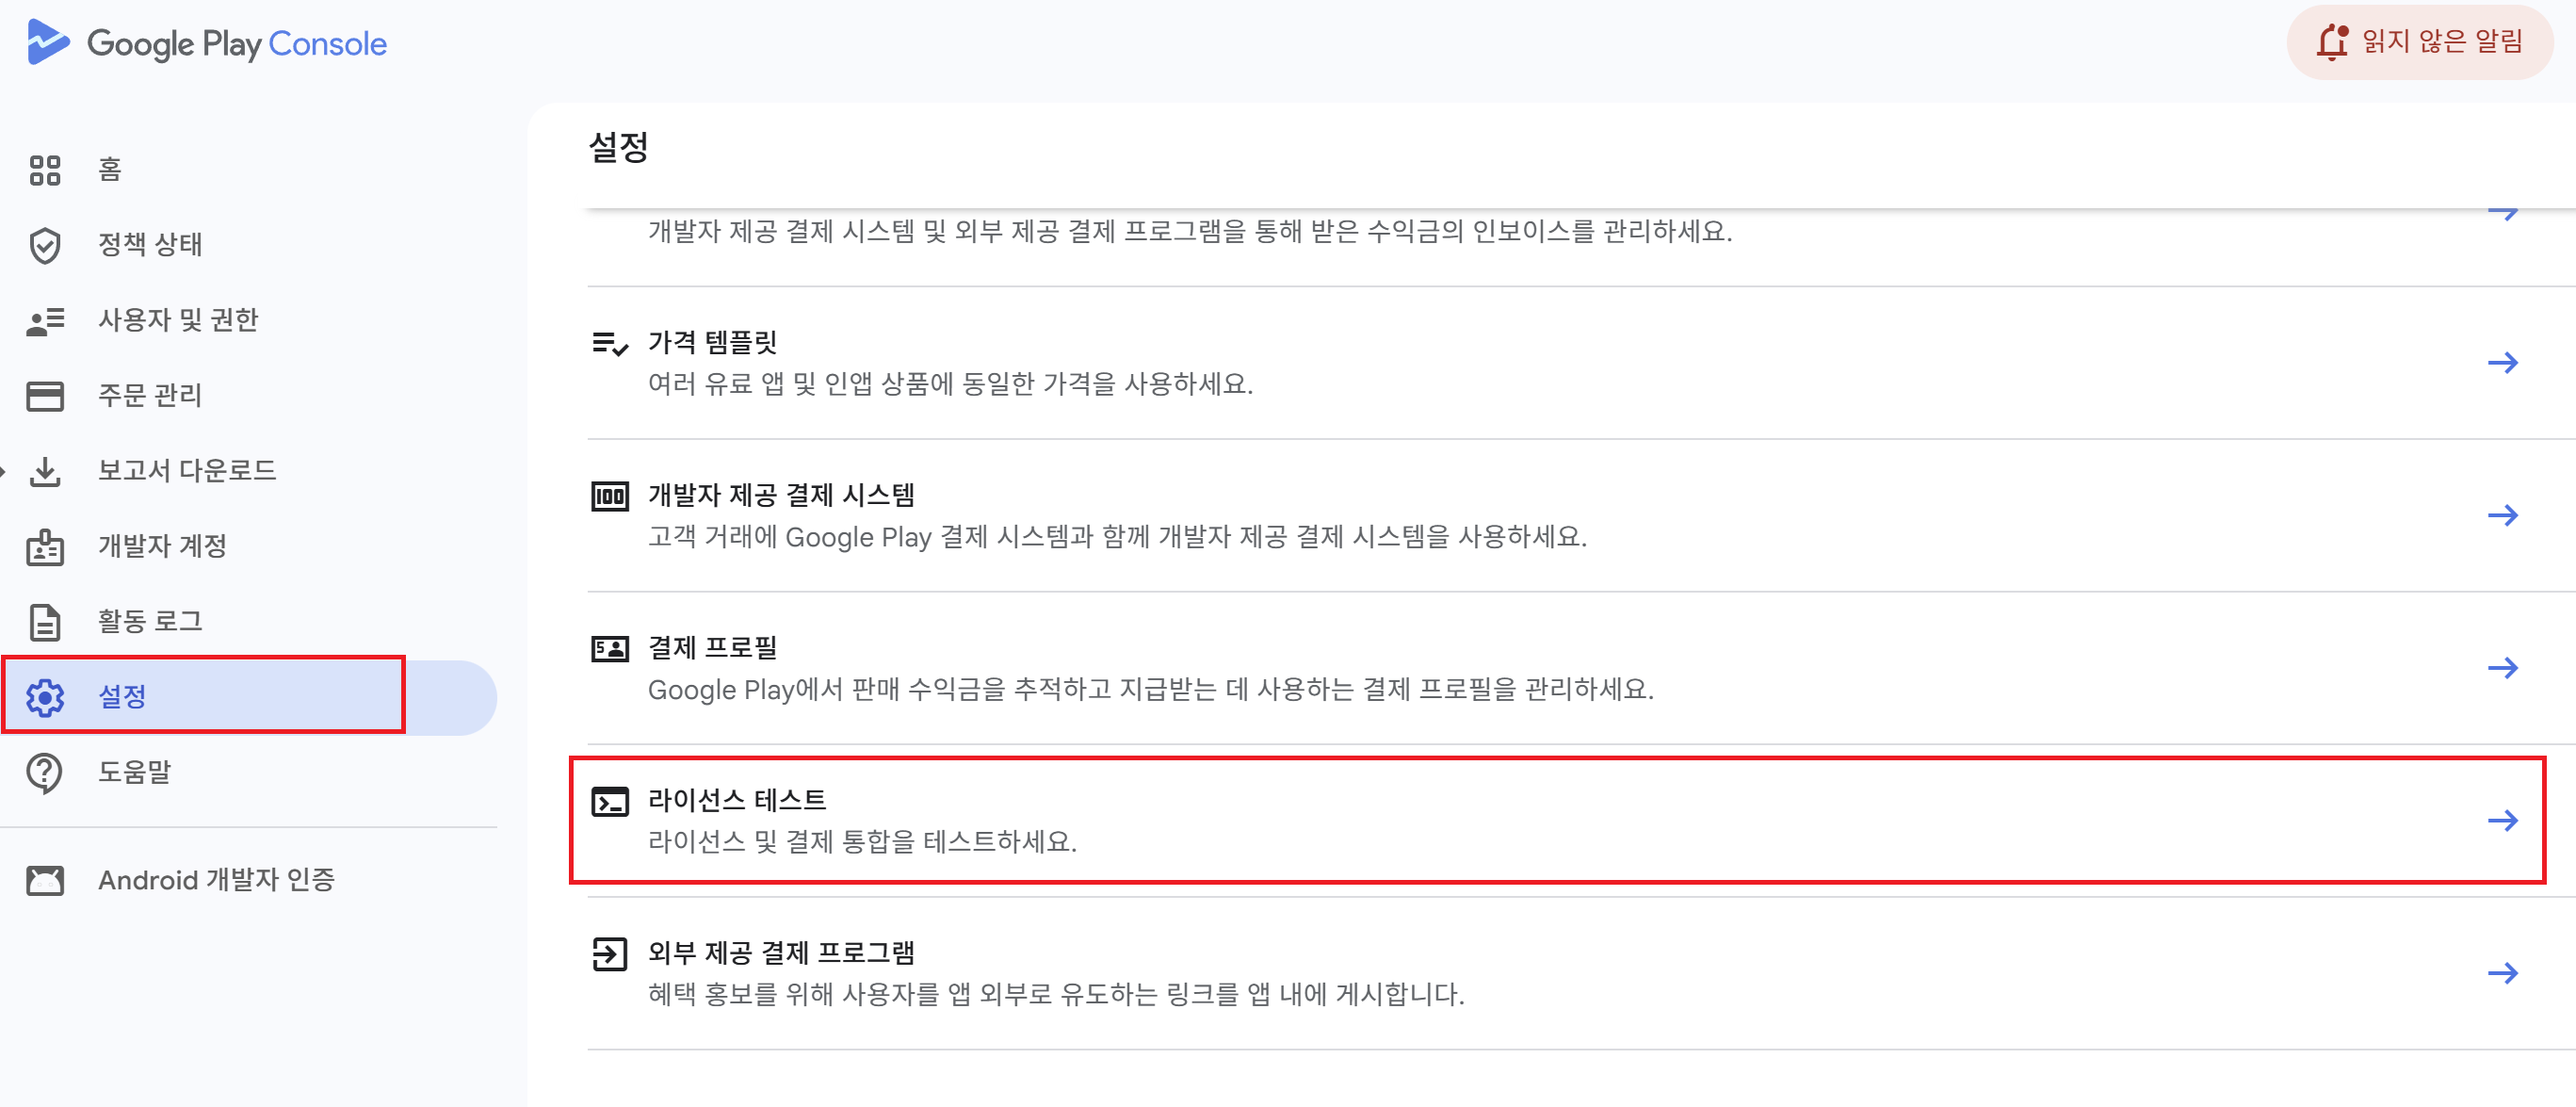
4-2. 라이선스 테스트 계정 등록
- Play Console 홈 → 설정(Settings) → 라이선스 테스트(License testing)
- 테스트용 Gmail 계정 추가 (위 트랙에 사용하는 동일한 계정) → 이 계정으로 Play Store에 로그인해야 테스트 결제 UI가 활성화됨
- 등록 후 바로 반영되지만, 반영이 늦으면 로그아웃 후 재로그인
4-3. 테스트 앱 설치 및 테스트
- 내부테스트 -> 테스터 탭 선택 -> 웹에서 참여 링크를 복사하여 앱 설치
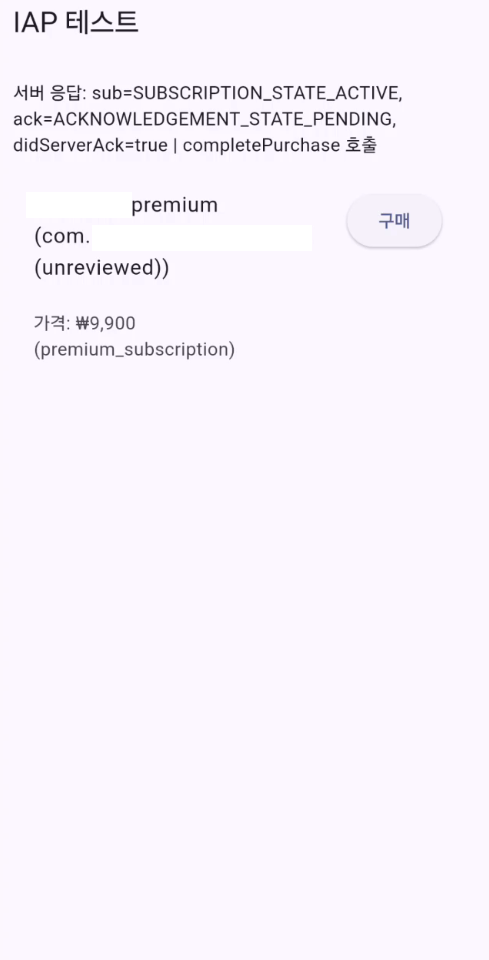
- 구매 버튼을 눌러 구독 시작
정상적으로 동작했다면 다음과 같이 표시됩니다.
Google Play 실시간 구독 알림 (RTDN) 설정
구독이 갱신되거나 취소·만료될 때마다 서버가 자동으로 이를 감지하려면 Real-Time Developer Notifications (RTDN) 기능을 활성화해야 합니다. Google Play → Cloud Pub/Sub → 서버로 이벤트가 전달되는 구조입니다.
sequenceDiagram
    participant Play as "Google Play"
    participant PubSub as "Cloud Pub/Sub"
    participant BE as "서버(FastAPI)"
    participant DevAPI as "Google Play Developer API"
    participant DB as "Database"

    Play->>PubSub: "RTDN 이벤트 게시 (base64 JSON)"
    PubSub->>BE: "HTTP POST /rtdn/google"
    BE->>BE: "base64 디코딩 및 알림 파싱"
    BE->>DevAPI: "subscriptionsv2.get 호출"
    DevAPI-->>BE: "현재 구독 상태 응답"
    BE->>DB: "상태 업데이트 (갱신·취소·만료)"
    BE-->>PubSub: "200 OK (처리 완료 응답)"
5-1. Cloud Pub/Sub 설정
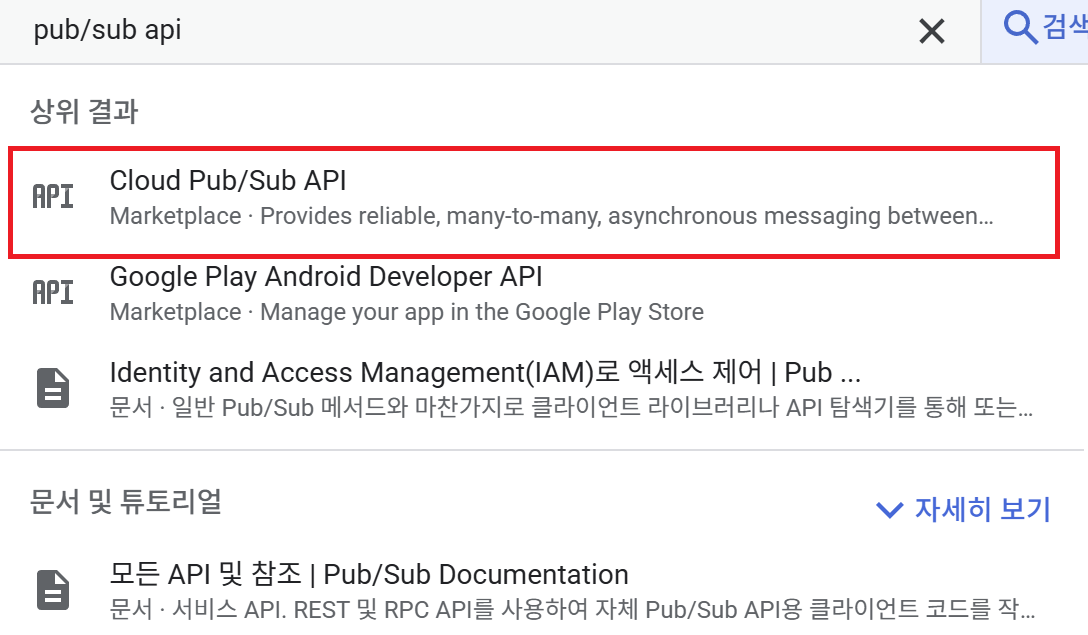
① API 활성화
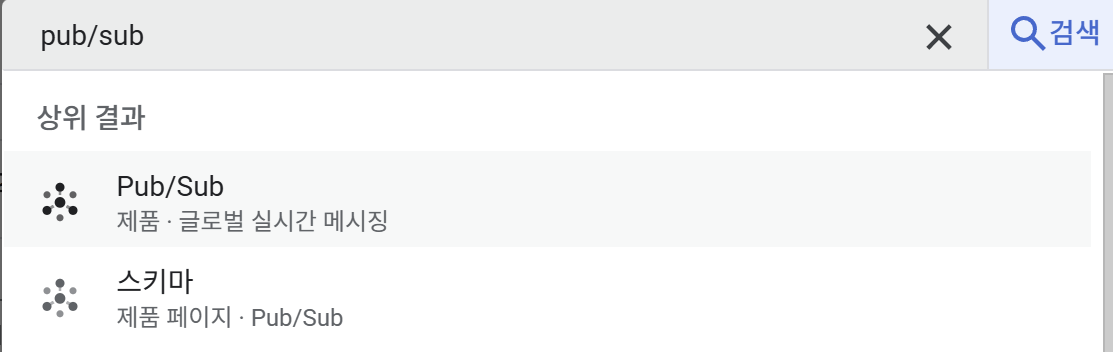
- Google Cloud Console
- Pub/Sub API 검색 → Enable
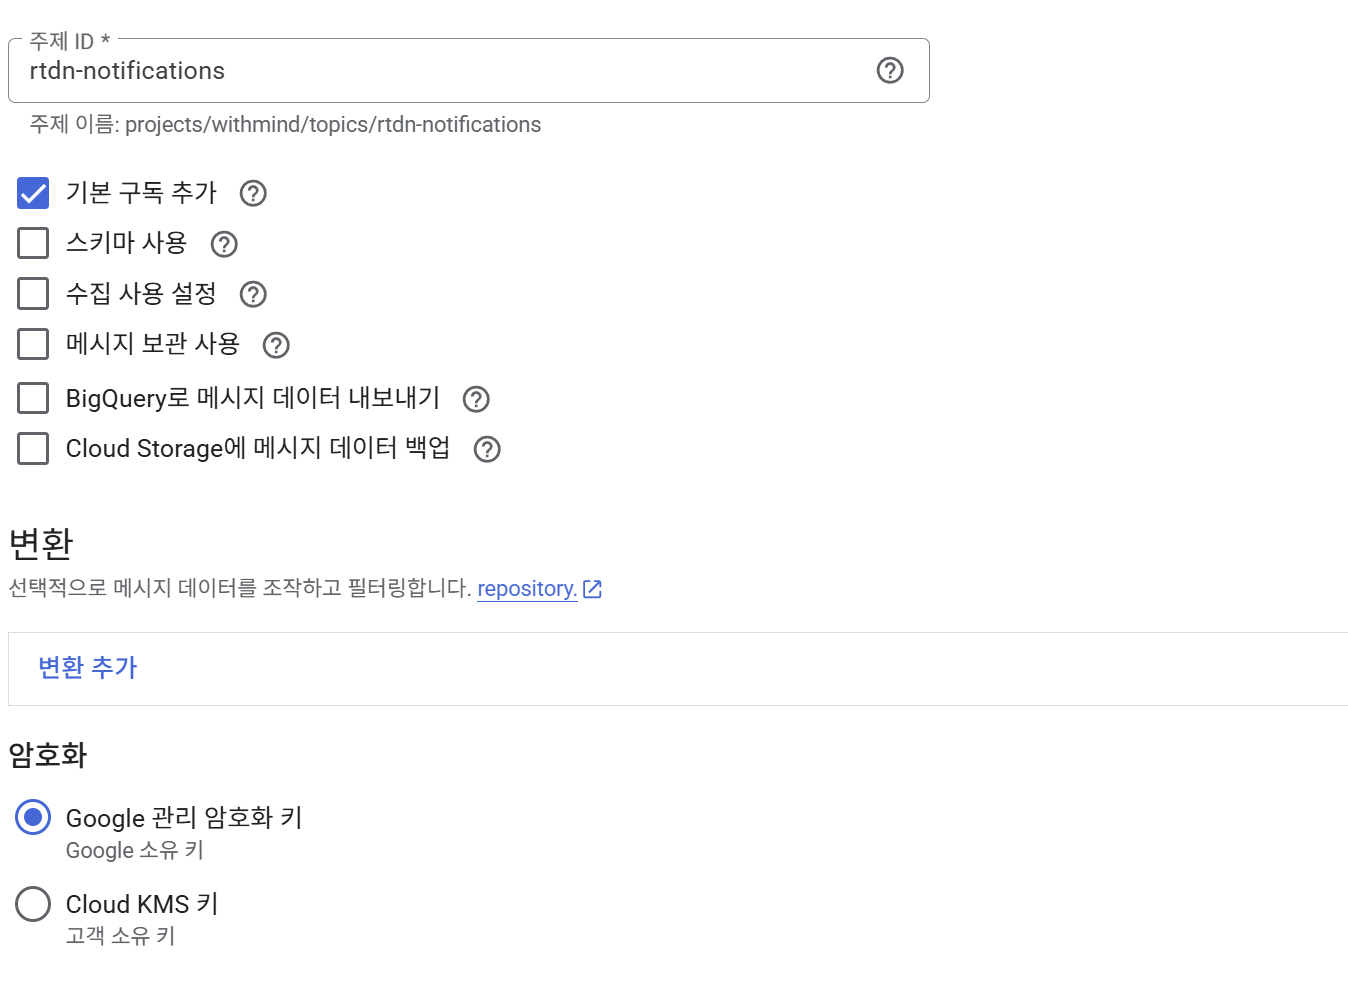
② 토픽(Topic) 생성
- Pub/Sub → Topics → Create topic
- ID:
rtdn-notifications등 - 생성 후 표시되는 전체 경로를 복사해둡니다.
1
projects/<PROJECT_ID>/topics/rtdn-notifications
③ 권한 부여
- 생성한 토픽 → Permissions 탭 → Add principal
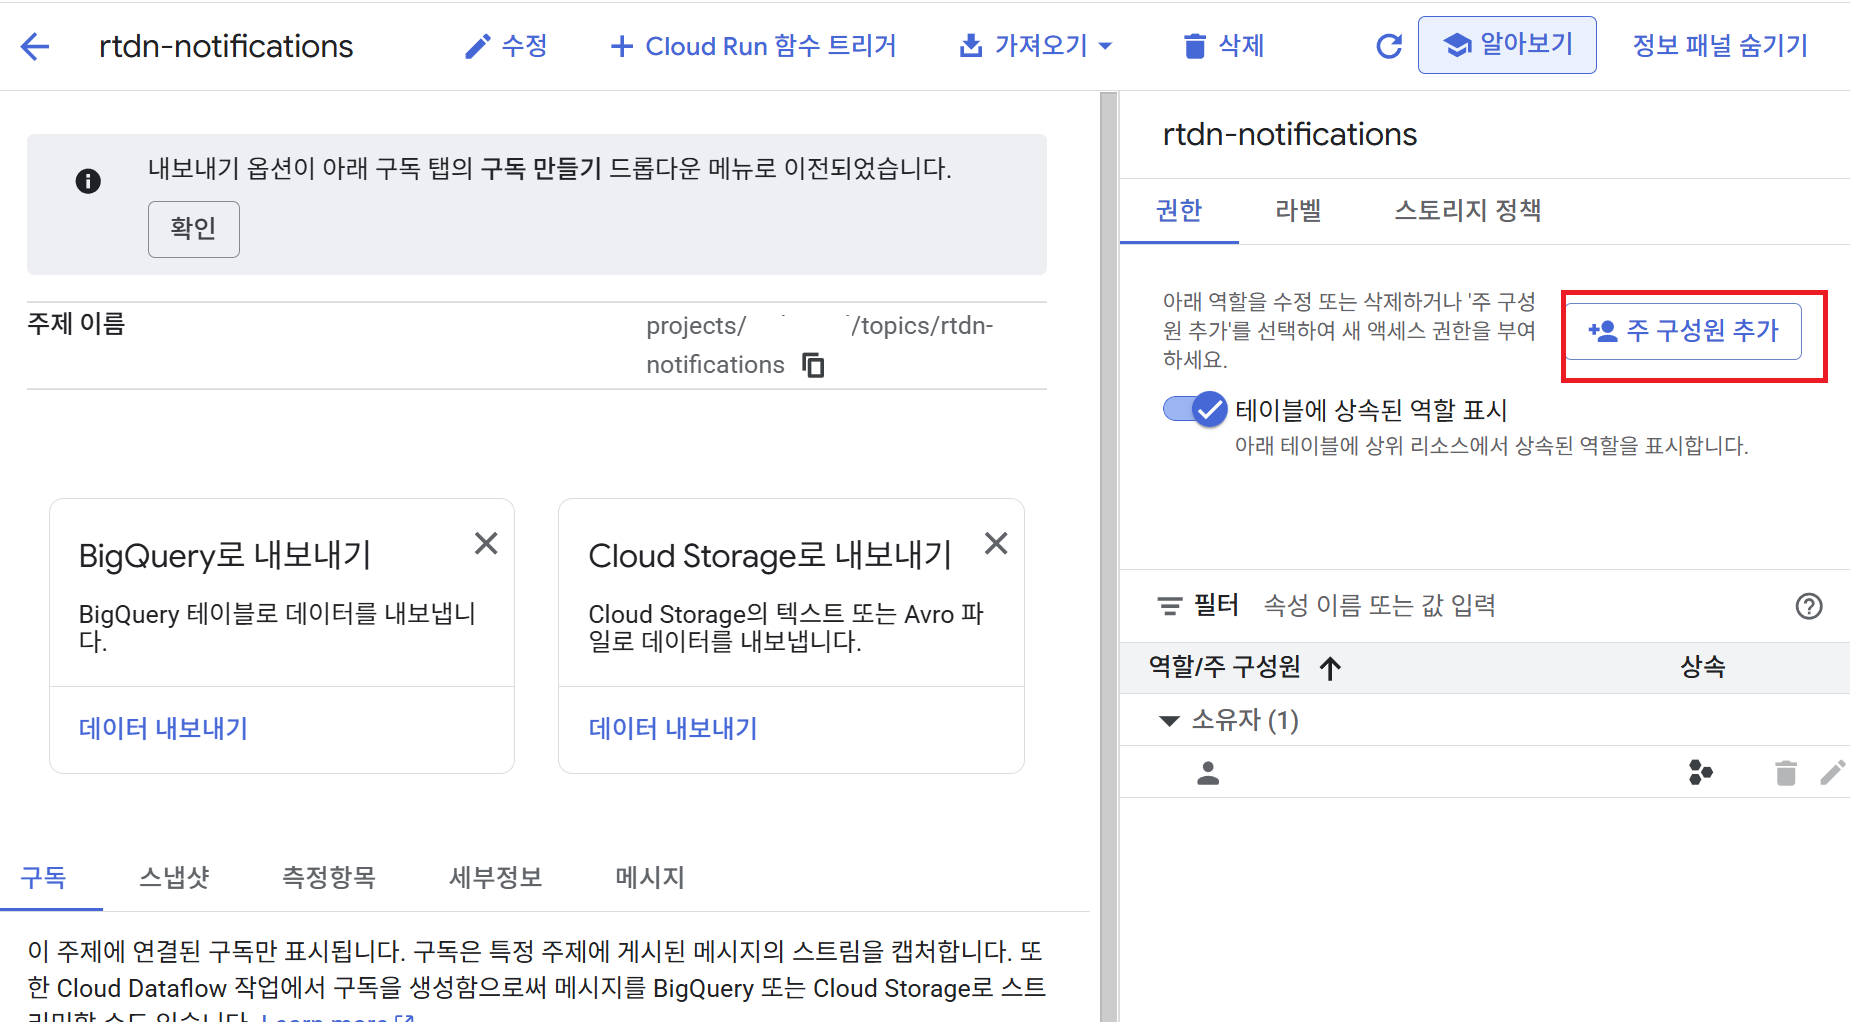
- 아래 이메일을 추가하고 Pub/Sub Publisher 역할 부여
1
google-play-developer-notifications@system.gserviceaccount.com
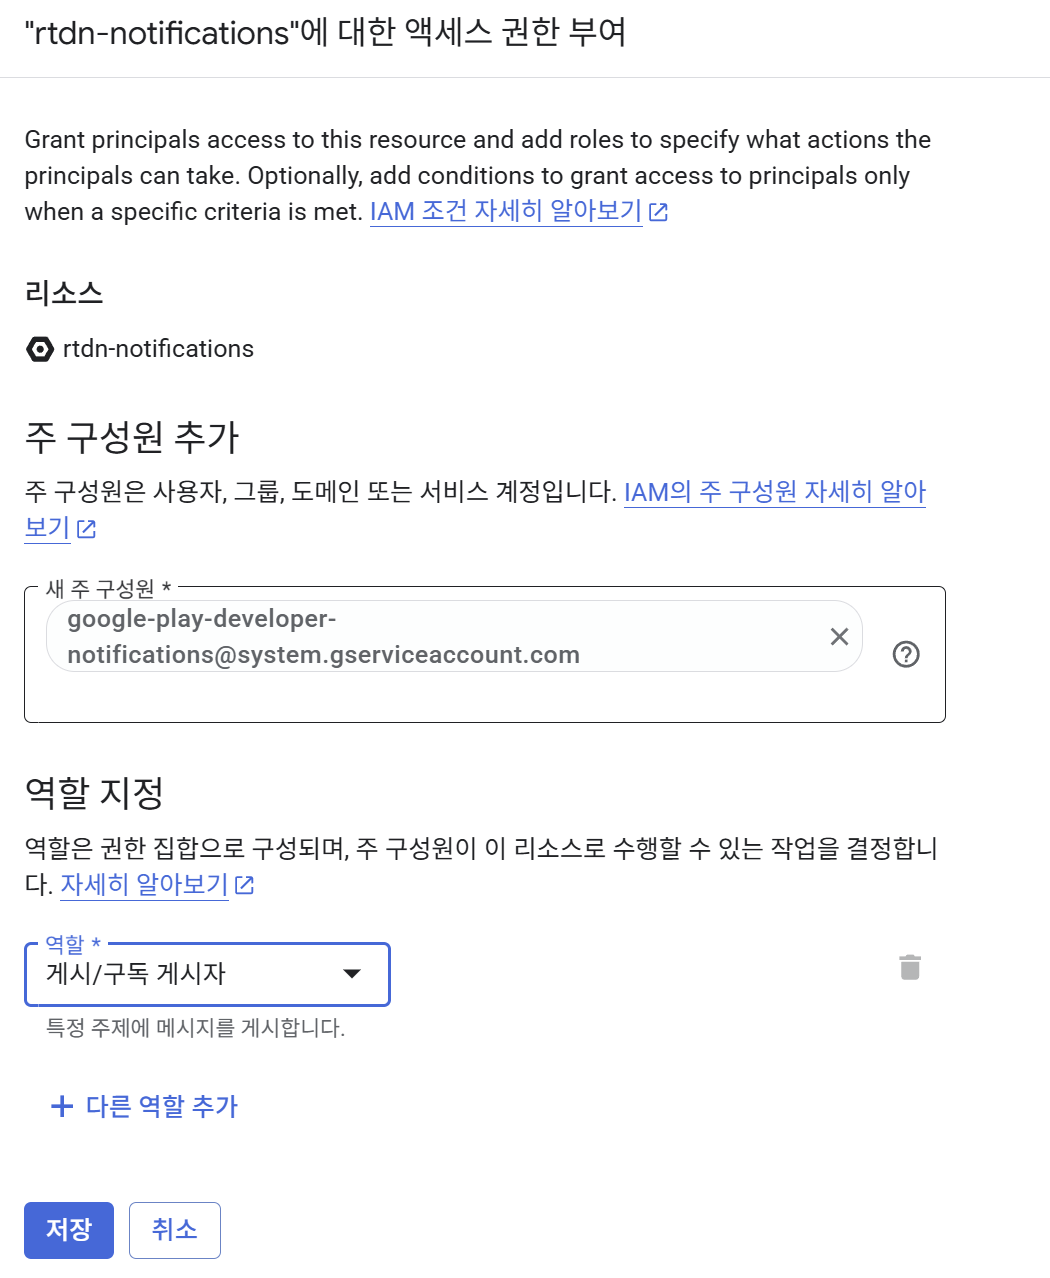
- 저장 후 1~2분 정도 기다리면 반영됩니다.
이 과정을 통해 Google Play가 해당 토픽으로 알림 메시지를 발행할 수 있게 됩니다.
④ 구독(Subscription) 생성
- 토픽 상세 페이지 → Create subscription
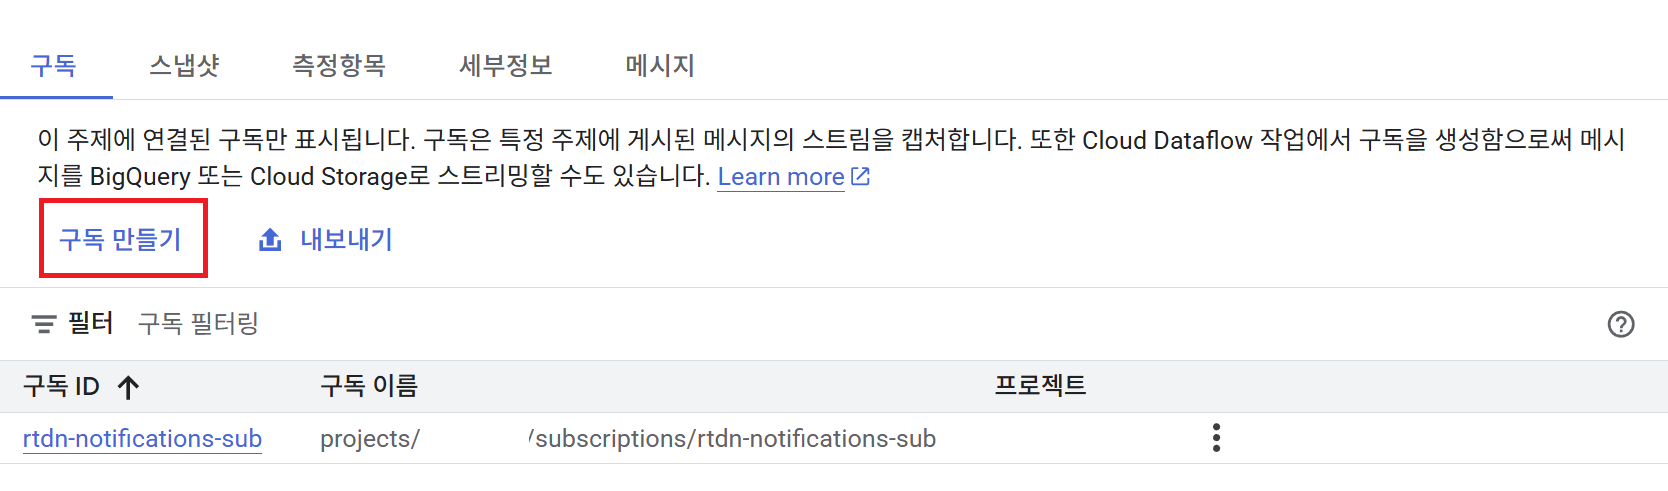
- ID:
rtdn-subscription - Delivery type: Push
Push endpoint URL:
1
https://{서버도메인}/rtdn/google- 나머지는 기본값 그대로 두고 Create
5-2. Play Console 연결
- Play Console → 앱 선택
- Monetize → Monetization setup → Real-time developer notifications
- Enable real-time notifications 체크
Topic name 입력:
1
projects/<PROJECT_ID>/topics/rtdn-notifications
- Save changes
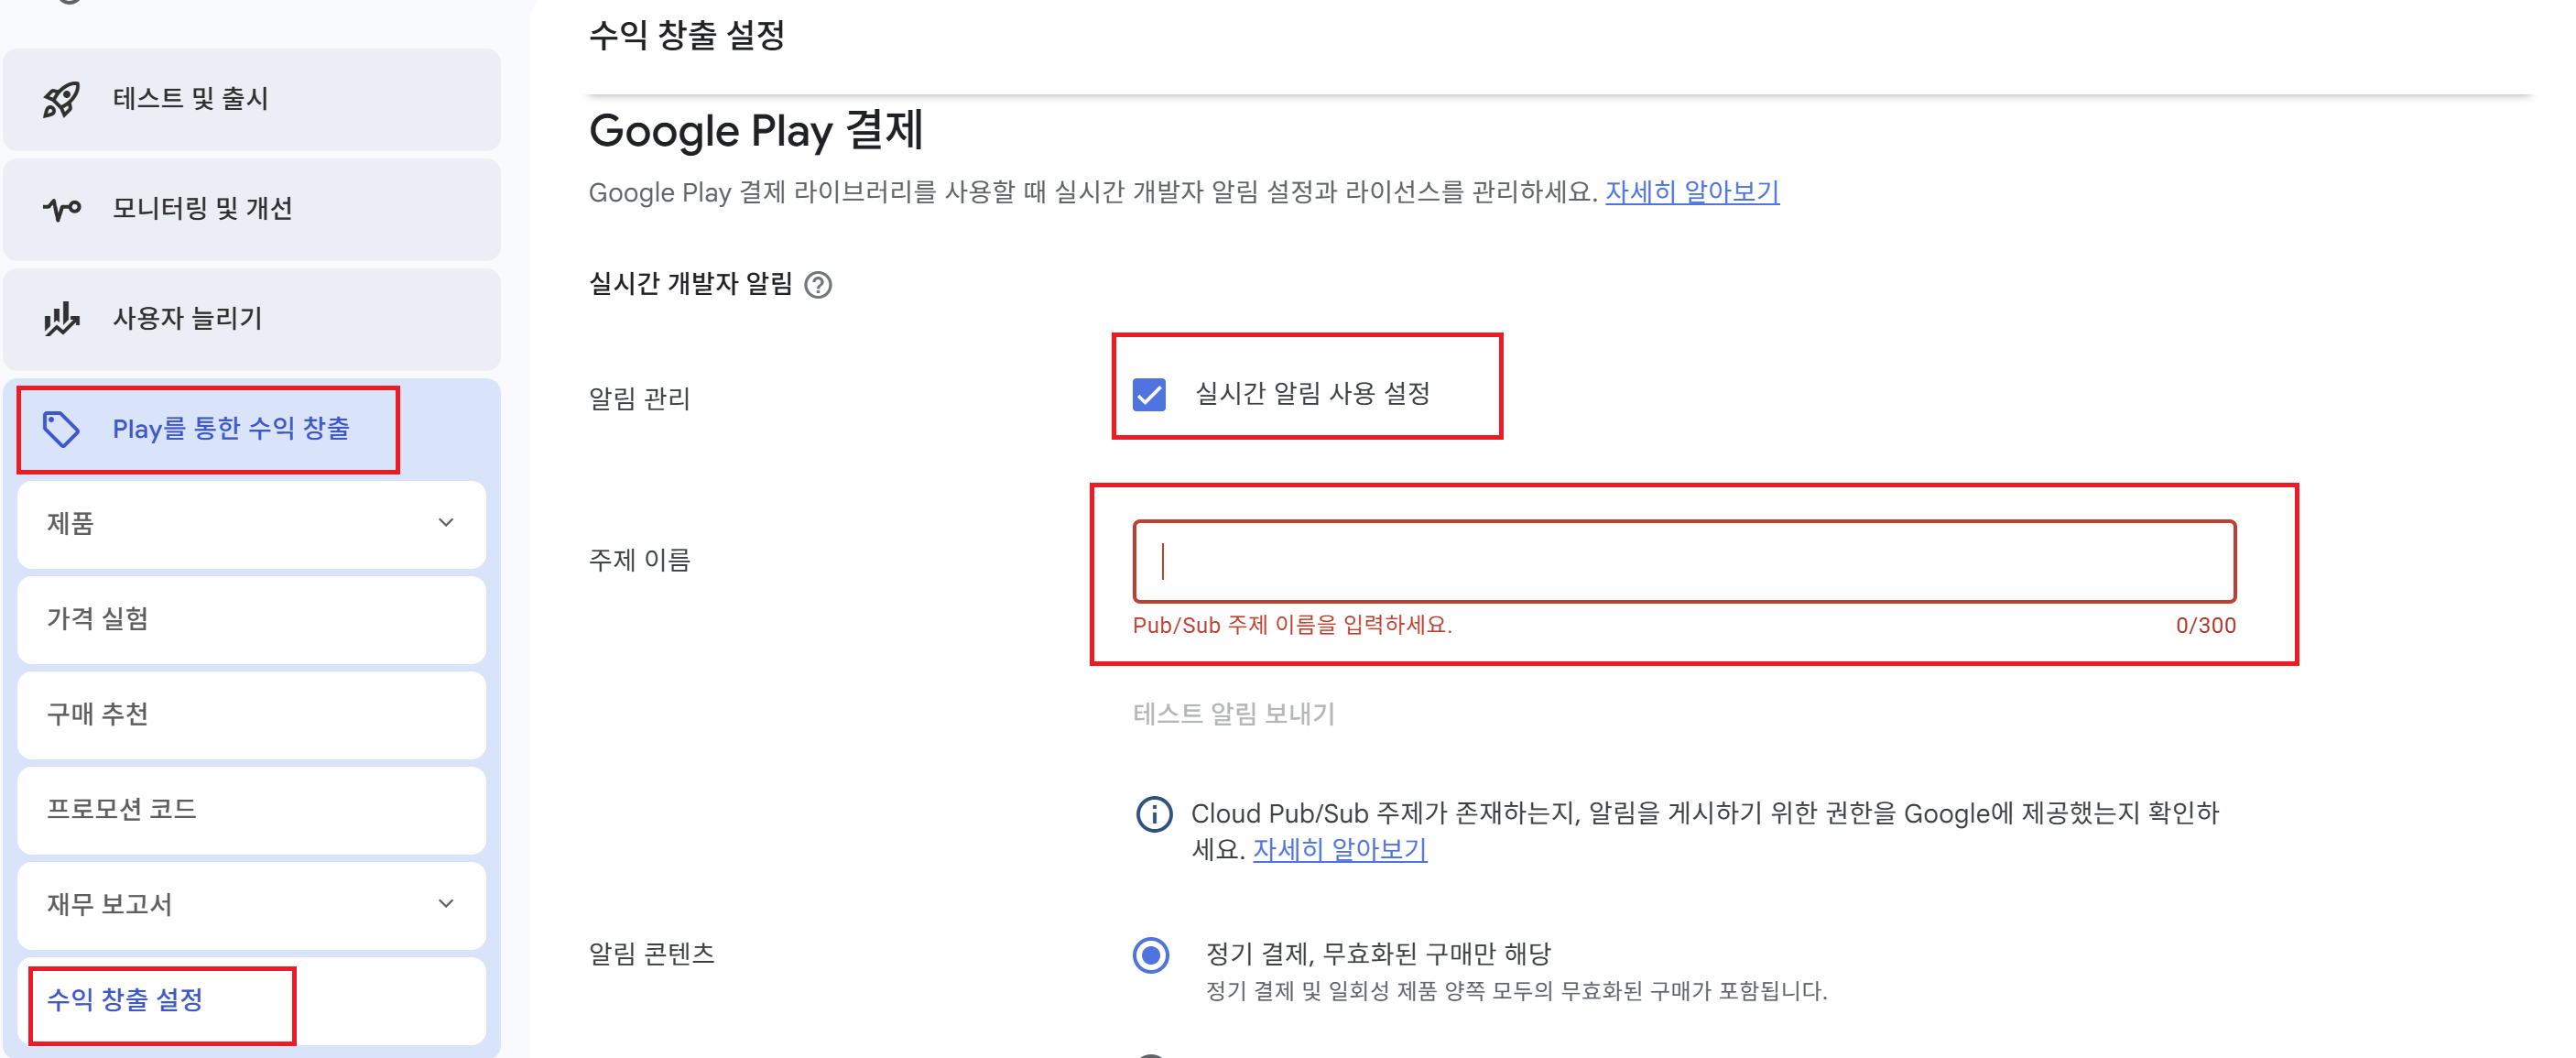
- Send test message 버튼으로 연결 성공 여부를 확인합니다.
5-3. 서버 구현 (FastAPI 예시)
아래 코드는 Pub/Sub이 전송한 RTDN 알림을 받는 /rtdn/google 엔드포인트 예시입니다. 알림 본문은 base64 인코딩된 JSON이므로, 디코딩 후 구독 상태를 다시 조회해야 합니다.
1
2
3
4
5
6
7
8
9
10
11
12
13
14
15
16
17
18
19
20
21
22
23
24
25
26
27
28
29
30
31
32
33
34
35
36
37
38
39
40
41
# iap/rtdn.py
from fastapi import APIRouter, Request, HTTPException
import base64, json
from google.oauth2 import service_account
from googleapiclient.discovery import build

router = APIRouter()
SCOPES = ["https://www.googleapis.com/auth/androidpublisher"]

def _android_publisher():
    creds = service_account.Credentials.from_service_account_file(
        "service-account.json", scopes=SCOPES
    )
    return build("androidpublisher", "v3", credentials=creds, cache_discovery=False)

@router.post("/rtdn/google")
async def handle_rtdn(req: Request):
    body = await req.json()
    msg = body.get("message")
    if not msg or "data" not in msg:
        raise HTTPException(status_code=400, detail="invalid format")

    decoded = base64.b64decode(msg["data"]).decode()
    data = json.loads(decoded)

    if "subscriptionNotification" not in data:
        return {"ok": True, "msg": "ignored (non-subscription event)"}

    n = data["subscriptionNotification"]
    purchase_token = n["purchaseToken"]
    notif_type = n["notificationType"]

    pub = _android_publisher()
    result = pub.purchases().subscriptionsv2().get(
        packageName=data["packageName"], token=purchase_token
    ).execute()

    # 구독 상태(result["subscriptionState"])에 따라 DB 업데이트 수행
    # 예: ACTIVE → 활성화, CANCELED/EXPIRED → 권한 회수 등

    return {"ok": True, "notificationType": notif_type}
RTDN은 “상태 변경”만 알리므로, 반드시
subscriptionsv2.get으로 실제 구독 상태를 재조회해야 합니다.